To garden in the desert with less water, you garden in water. It sounds backward, doesn’t it? But when fish and vegetables share a recirculating system, that water does a lot of work before it ever needs replacing.
At Arizona Worm Farm, I explored aquaponic systems with owner Zach and farm manager Leslie. Their experience is encouraging: fast-growing greens, repeated harvests, and water use they estimate at about one-tenth of what growing in soil requires.
What surprised me most was how approachable some of these systems are. One connects to an ordinary household aquarium. Another uses a recycled bulk container. Neither is a plant-it-and-forget-it garden, but aquaponics may be more accessible than you think.
Key Takeaways
- Aquaponics recirculates fish water through plants, with the farm reporting water savings of about 90%.
- Greens and herbs perform especially well, while larger fruiting crops offer room for experimentation.
- Arizona backyard systems need shade and a plan for extreme summer temperatures.
- Start gradually and maintain balance through regular water testing, feeding, observation, and harvesting.
Table of Contents
- How Aquaponics Works, and Why It Can Save Water
- What Grows Best in Aquaponics?
- Does Aquaponics Work Outdoors in Arizona?
- A Simple Aquarium Aquaponics System for About $150
- The DIY IBC Tote Aquaponics System
- Deep Water Culture vs. a Media Grow Bed
- Getting Started: Be Patient and Build Balance
- Water Testing and Everyday Maintenance
- Is Aquaponics Worth Trying?
How Aquaponics Works, and Why It Can Save Water
The main difference between hydroponics and aquaponics is where the plant nutrients come from. Both grow plants without soil, but in hydroponics, you supply the nutrients. In aquaponics, fish provide the foundation for feeding the plants.
The basic cycle works like this:
- You feed the fish.
- The fish produce waste.
- Beneficial bacteria convert ammonia from that waste into forms of nitrogen the plants can use.
- The plants take up nutrients, helping clean the water.
- The water circulates back to the fish tank.
The bacteria are an important part of this partnership. It is not simply a matter of putting plants over a fish tank. Fish, bacteria, plants, and moving water need to stay in balance. For a deeper technical explanation, the FAO guide to small-scale aquaponic food production covers the biology and system design.
Because water moves through the system repeatedly rather than being applied to soil each time you irrigate, aquaponics can substantially reduce water use. Zach and Leslie describe savings of about 90% in their systems. That is their reported experience, not a guarantee that every backyard setup will achieve exactly the same result.
And water savings do not mean no water maintenance. These systems still need attention, including water changes when conditions call for them.
What Grows Best in Aquaponics?
Leafy greens are where these systems really shine. Arizona Worm Farm has had especially strong growth from lettuce, kale, Swiss chard, and celery. Herbs, including cilantro, are also doing well.
The celery was a wonderful example. Zach explained that celery grown in their soil sometimes develops bitterness associated with salt accumulation. The aquaponic celery had a fresh, pleasant flavor, and I enjoyed tasting it.
They have noticed a flavor difference most clearly in the greens, celery, and chard. Tomatoes and peppers have not shown the same noticeable improvement in flavor.
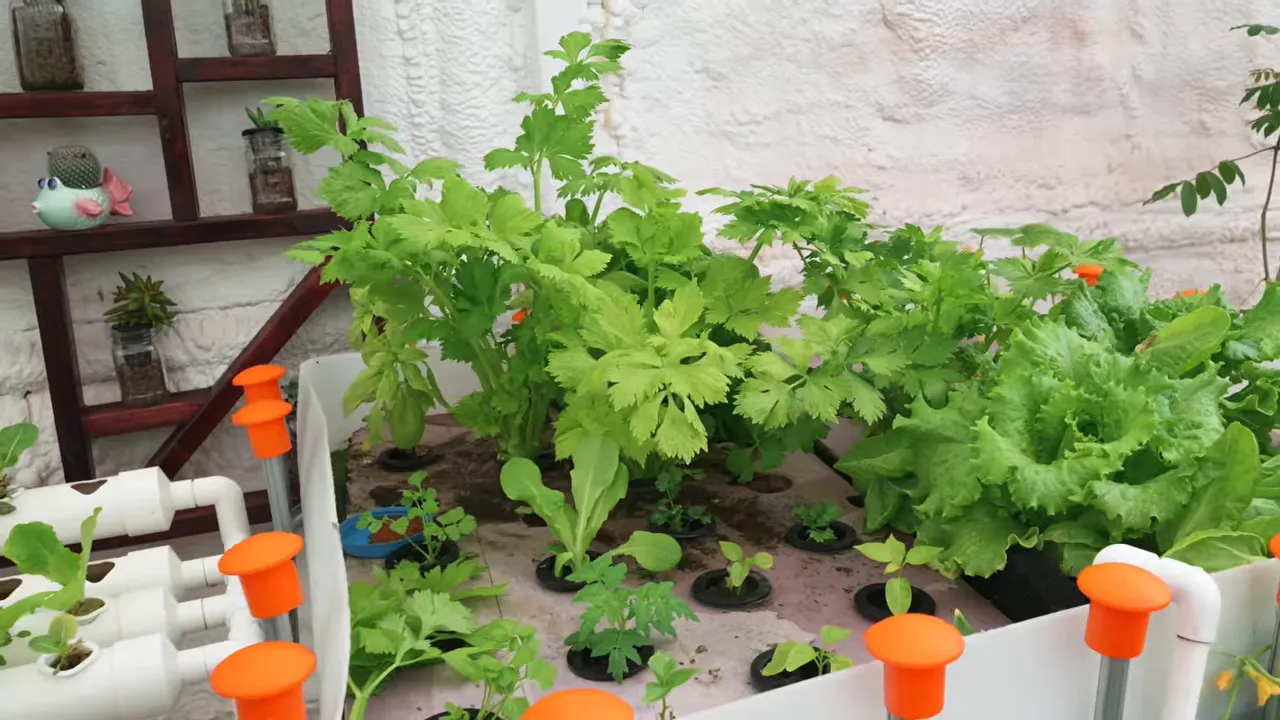
The farm is also experimenting with larger fruiting crops:
- Tomatoes
- Cucumbers
- Peppers
Those crops are showing promise, but the enthusiasm for greens is hard to miss. A productive lettuce system means you need to keep eating and harvesting, not just admire how nicely everything is growing.
Growing Fish Along With the Vegetables
The larger systems use tilapia, a warm-water fish Zach finds relatively easy to raise in Arizona. The fish receive tilapia pellets and black soldier fly larvae raised at the farm.
That adds another useful connection to the system. Food waste feeds the larvae, the larvae feed the fish, and nutrients from the fish support the vegetables. It is a practical example of turning waste into something useful instead of sending it to a landfill.
Leslie reported that one group of young tilapia was ready to harvest after about three months in their care. That is a result from their particular fish and growing conditions, rather than a universal harvest schedule.
Zach was looking forward to a meal that made the whole idea feel very real: fish tacos with the fish and salsa ingredients coming from a roughly 3-by-3-foot backyard setup. Everything but the tortilla!
Does Aquaponics Work Outdoors in Arizona?
Yes, but summer heat is a major consideration. Zach estimated an outdoor growing window of about nine months for the kind of backyard setup we discussed. June, July, and August would be too hot without additional temperature management.
Even though tilapia like warm water, the tank cannot become excessively hot in summer or too cold in winter. A circulation pump is essential, and temperature control needs to be part of the plan.
For a backyard system without a greenhouse, Zach recommended full shade, particularly for growing greens. That advice is specific to these systems in Arizona’s intense conditions. The greens they are growing can perform well in that protected setting.
Leslie also emphasized choosing the location carefully before filling the tank. Learn your yard’s microclimates and find a sheltered, shaded space that can serve as a semi-permanent home.
A full tank is not something you can simply scoot across the patio. If the location turns out to receive too much sun, you would need to drain the system before moving it.
A Simple Aquarium Aquaponics System for About $150
You do not need to begin with a large tank of edible fish. One of the most approachable systems at the farm connects a household aquarium to a tiered PVC growing rack.
Leslie estimated about $150 to get started with the basics for a setup like this. Treat that as a ballpark figure, since your cost will depend on what you already own and the components you choose.
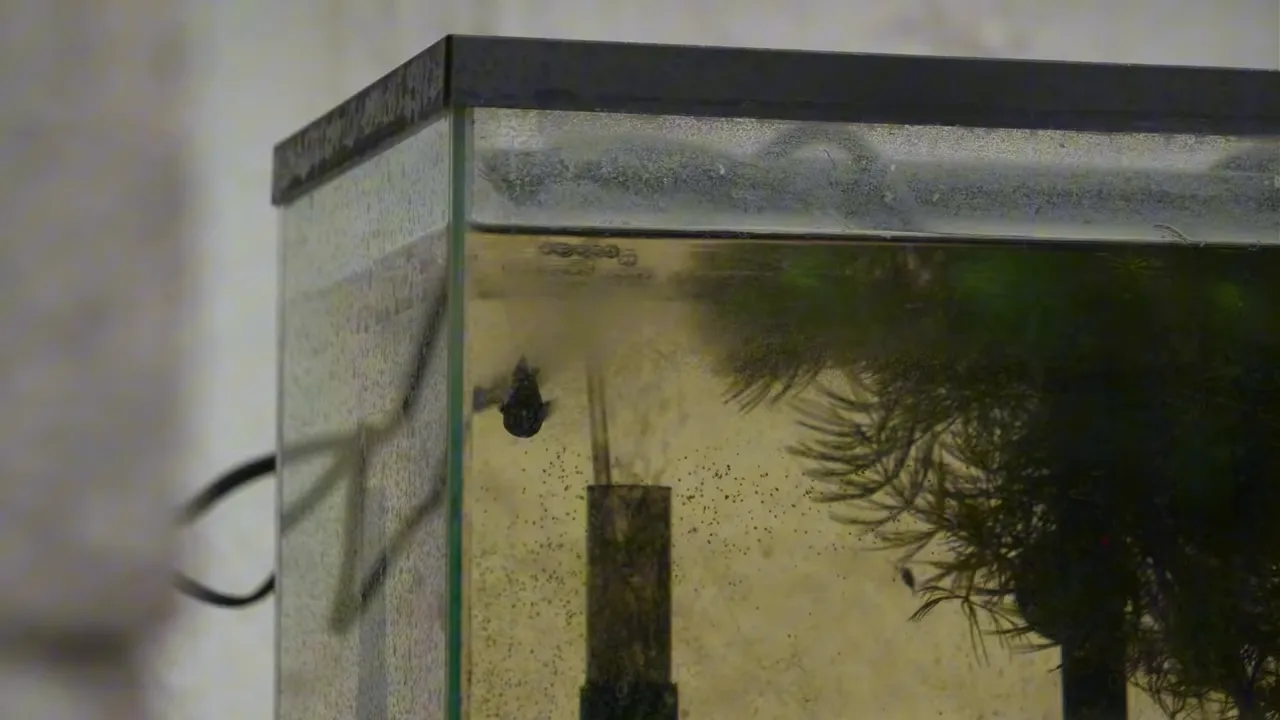
The water follows a straightforward path:
- A submersible pump moves water from the aquarium to the top of the growing rack.
- Gravity carries it through the PVC growing channels.
- Plant roots take up nutrients as the water passes through.
- The water returns to the aquarium, disturbing the surface and helping add oxygen.
The setup includes the aquarium, a PVC growing kit, a circulation pump, plants, fish, and an air pump with an air stone or sponge filter.
Although the growing rack may be sold as a hydroponic kit, connecting it to fish as the nutrient source makes the combined system aquaponic.
How the Plants Fit Into the Rack
The farm starts plants in a seed-starting area, then places them in small mesh-style growing cups. The cups support the plants while the roots extend into the water flowing through the channels.
That makes it easy to grow a selection of greens and herbs in a compact space. Zach described the plants as helping keep his aquarium clean and greatly reducing his tank-cleaning work. That benefit does not replace feeding, testing, or checking the equipment.
An indoor location also removes the outdoor summer limitation, making year-round growing possible in a suitable indoor environment.
The DIY IBC Tote Aquaponics System
For a larger backyard option, the farm demonstrated a recycled IBC tote system. IBC totes are large containers held within metal cages. Their “chop and flip” design repurposes the top section as a grow bed above the fish tank.
Zach estimated approximately $300 to $350 for their DIY setup if you obtain a used tote and make the cuts yourself. His estimate included the necessary components and the first 25 fish. That fish count describes their example, not a stocking recommendation for every system.
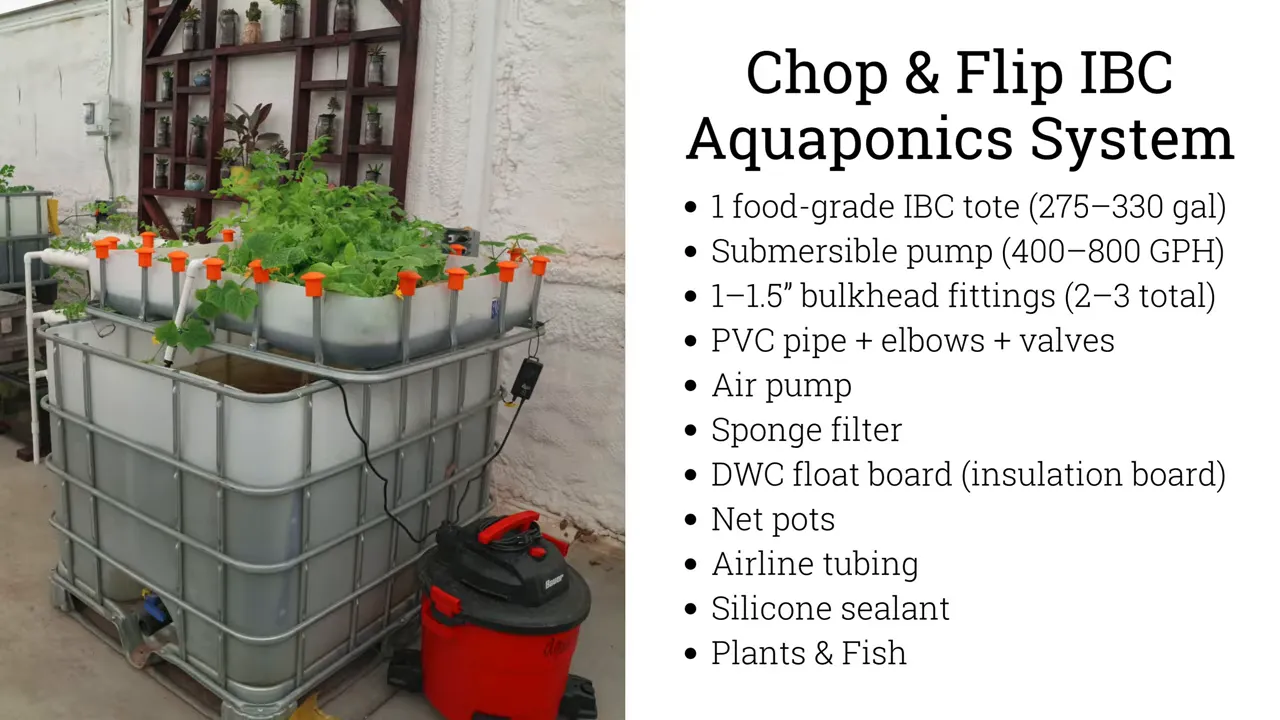
The components shown for this design included:
- A food-grade IBC tote, approximately 275 to 330 gallons
- A submersible pump rated at 400 to 800 gallons per hour
- Bulkhead fittings, PVC pipe, elbows, and valves
- An air pump, airline tubing, and sponge filter
- A floating board with planting holes
- Net pots, plants, and fish
- Silicone sealant
These are the main pieces of their example, rather than a complete construction plan. The arrangement needs to keep water circulating reliably between the fish and plants.
In the floating-bed version, growing cups sit in holes cut into insulation board. Rockwool supports the plants and holds moisture around the young roots. As the plants develop, their roots extend down into the water.
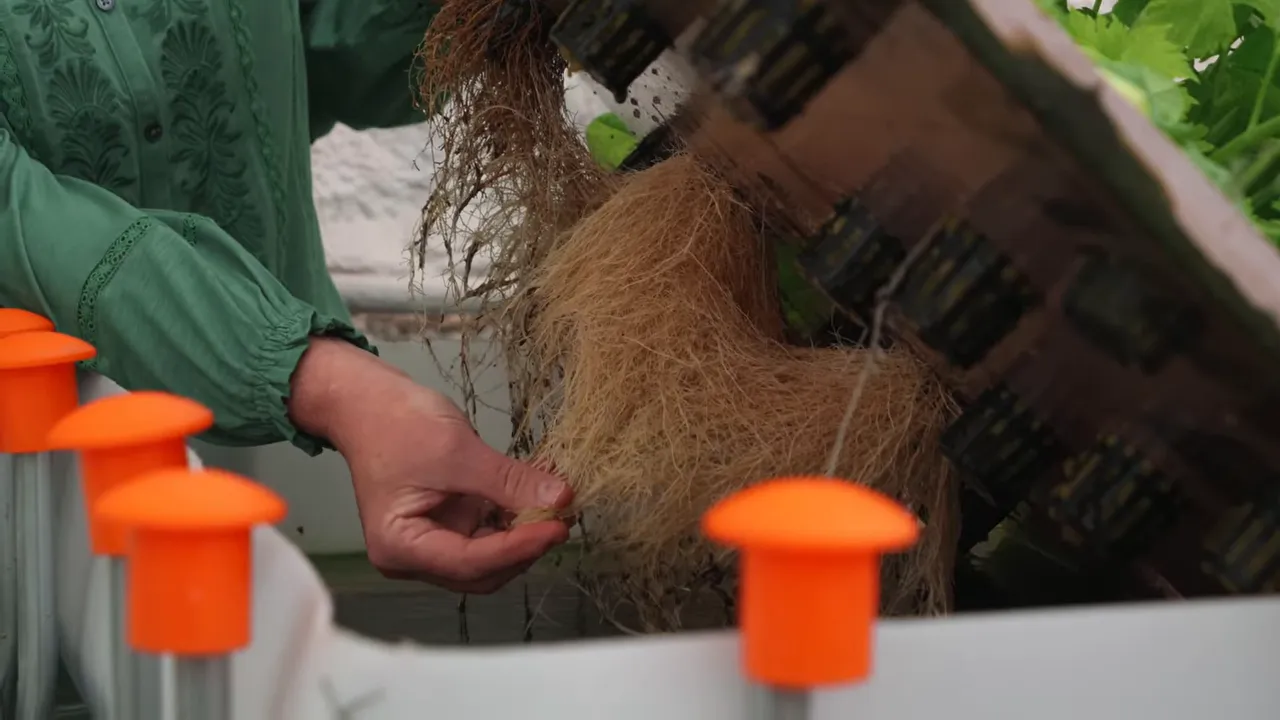
The roots we examined were impressive, especially considering that those plants had been in the system for less than a month.
Leslie also pointed out nutrient-rich sediment in the grow bed. She sometimes removes that material for use in the rose garden, another way nutrients from the system can be put to work.
Deep Water Culture vs. a Media Grow Bed
The farm uses two different growing approaches. Both connect plants to fish water, but the root environments are quite different.
Deep Water Culture: Plants on a Floating Board
In deep water culture, a board floats on the grow-bed water, with plant roots hanging below it. This is the system with the large masses of roots beneath the net pots.
Leslie finds this method requires a little more maintenance than the media-bed approach. It can grow beautiful greens, but keeping the water and living components balanced is important.
Media Grow Bed: Plants Rooted in Lava Rock
A media bed supports the plants in lava rock. In the farm’s example, fish water trickles into the bed, keeping the rock hydrated without creating the same deep pool of exposed water.
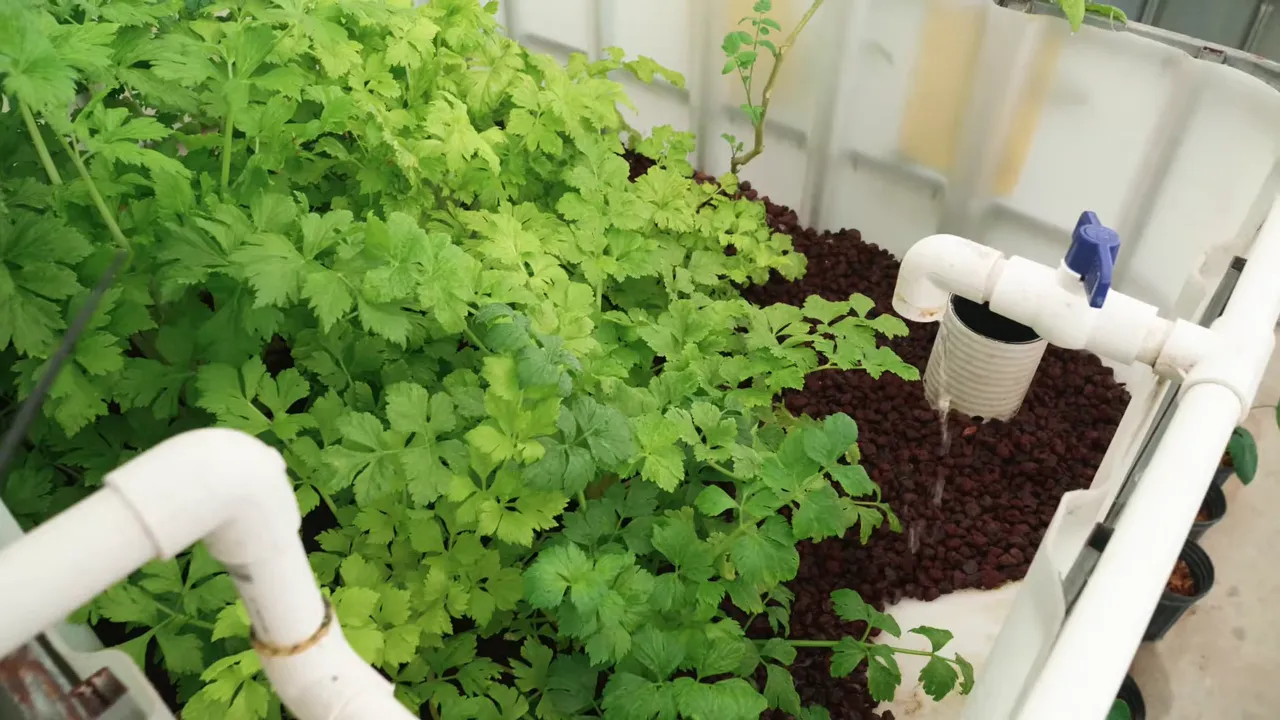
Leslie considers this approach more forgiving for beginners. In her experience, it offers:
- Less maintenance than the floating-bed system
- Fewer mosquito issues
- Room for deeper-rooted crops, including tomatoes and other nightshades
- Flexibility to grow a wider selection of plants
The tote design also leaves room to experiment. Leslie explained that the floating board can be removed and the grow bed drained, cleaned, and converted to lava rock. That conversion changes how the bed grows plants, so it is more than simply pouring rock into an operating floating system.
Getting Started: Be Patient and Build Balance
Leslie’s strongest advice was simple: do not do too much at once.
Adding too many fish quickly or planting heavily before the system has established its nutrient cycle can cause problems. The plants need available nutrients, and the fish need water conditions that support their health.
At the farm, Leslie described allowing the system to begin cycling with fish before gradually adding plants. She mentioned an initial period of a week or two in their practice, but that should not be treated as a guaranteed cycling deadline. Water testing, rather than the calendar alone, needs to guide decisions.
The practical lesson is to start gradually. Give the system time to develop, observe how it responds, and resist the temptation to fill every planting hole and add more fish immediately.
Water Testing and Everyday Maintenance
Aquaponics removes some familiar garden chores, but it introduces others. There is no weeding, yet you are caring for fish and a living water system as well as plants.
What to Look For
Leslie pays attention to plants that begin yellowing before they reach maturity. That tells her to investigate water conditions, including pH and ammonia, rather than assuming the plants are simply finished producing.
A strong fishy smell is another warning sign for her. She checks what has changed, considers the fish’s behavior, and evaluates whether a water change is needed.
These observations are useful clues, not diagnoses by themselves. Water testing helps explain what appearance and smell cannot.
How the Water Is Tested
Leslie demonstrated a dip-strip test: place the strip in the water as directed, then compare its colors with the chart on the package. The farm also uses a liquid-reagent test kit.
The important part is making testing a routine, not waiting until the fish or plants are clearly struggling. Follow the instructions for the particular kit you choose.
How Much Time Should You Allow?
Leslie’s estimates varied by system and task:
- The simple aquarium setup: About 30 minutes to an hour of attention per week.
- The larger home tote setup: About 10 to 15 minutes each morning for testing, feeding, and checking plants.
- Harvesting: Another 10 to 15 minutes when needed, with weekly harvesting to plan for.
Think of it much like a garden: a little attention each day, with extra time for harvesting and maintenance. These estimates describe the farm’s routines, not a fixed schedule for every setup.
Is Aquaponics Worth Trying?
The speed of growth was one of Leslie’s favorite things, and it was easy to understand why. She pointed out lettuces planted only two weeks earlier and other plants that had been in place for about three weeks. One growing area had been replanted five times within three months.
Those are examples from their systems, not promises for every crop, but they show why aquaponics has captured their enthusiasm. This is the kind of fast food I can get excited about.
There are other practical benefits, too: no weeding, elevated growing beds, and less bending over. Being able to walk up to a productive bed and harvest comfortably matters.
The biggest reason not to try it? Not having the time or willingness to maintain it. Aquaponics can simplify some parts of growing food, but it does not eliminate responsibility.
For a gardener who enjoys checking plants regularly, learning a new system, and finding ways to use less water, it is an exciting option. A small aquarium system can offer a manageable introduction. A tote system provides room to explore growing both fish and vegetables. Either way, the best starting point is the same: choose the right location, begin slowly, and give the living system time to find its balance.


