I’ve enjoyed growing in my elevated beds even more than I expected. This fall, I’m turning one into an herbal tea garden, filled with herbs I can snip for a fresh cup whenever I like.
The plan is simple: step outside in the morning, gather a few herbs, pick a lemon from my tree, and make tea. Then I can bring my cup back outside and enjoy the garden. I’m trying to do more of that, slowing down instead of always moving on to the next garden job.
Mint, lemon balm, several kinds of thyme, sage, and chamomile are all part of the plan. But before planting, I had a little work to do. This bed had dried out over the summer, and the soil needed some attention.
Key Takeaways
- Choose herbs you enjoy drinking, with room to experiment with different varieties and flavors.
- Rehydrate dried, water-resistant soil thoroughly before planting herbs in an elevated bed.
- Use oyas and seasonal mulch layers to help maintain moisture in the bed.
- Steep about 2 tablespoons of fresh herbs per cup for 5 to 10 minutes.
Choosing Herbs I’m Excited to Use
I’m drinking more herbal tea than I used to, and I want more of it to come from my own garden. There’s something especially satisfying about growing my own organic herbs and knowing exactly how they’ve been cared for.
Rather than choosing just one or two plants, I’m making room for a variety of flavors:
- Strawberry mint and other mints: The strawberry mint really does smell like strawberries. I couldn’t wait to try it.
- Lemon balm: One of the herbs I’m pairing with mint for my first cup.
- Lime, coconut, orange, and creeping thyme: Thyme is my favorite herb flavor, and I’m excited to compare the different varieties.
- Golden sage and Chef’s Delight sage: Fresh plants to replenish my supply after summer.
- Chamomile: I’ve been drinking chamomile tea every night and still have some saved from last year.
- French tarragon: Another herb included in this small-space planting.
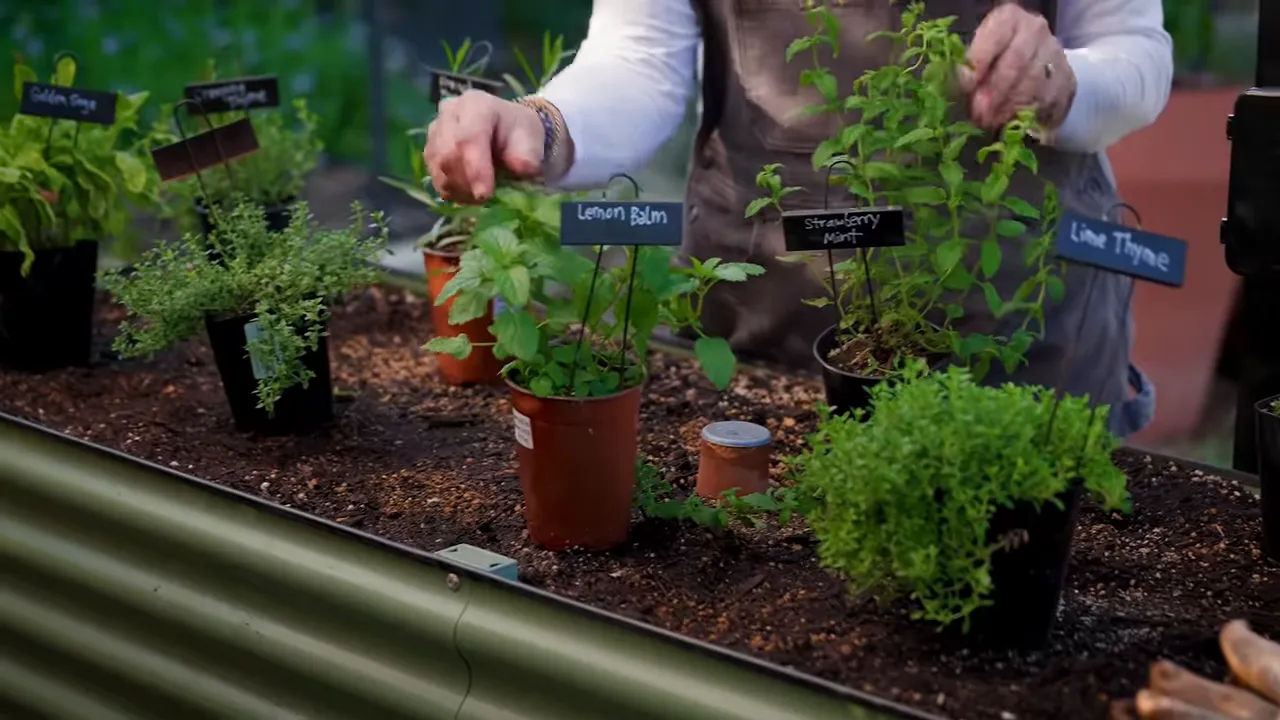
I can never have enough thyme. Really, it’s my favorite flavor profile for an herb. Growing several varieties together gives me a chance to find out whether I can taste the differences, not just notice them on the labels.
Chamomile is getting a little extra room elsewhere, too. I started a batch indoors, with some plants for this bed and others growing in the side yard.
What about mint and lemon balm spreading?
Yes, mint and lemon balm can spread enthusiastically. In this case, they’re contained in the elevated bed, and I’m comfortable giving them room to fill in. I want plenty of fresh herbs to harvest.
That’s a deliberate choice for this bed, not a reason to ignore their spreading habit. If you don’t want them taking over a mixed planting, give that some thought before adding them. The University of Minnesota Extension’s guide to growing herbs is a useful reference for planning an herb garden and understanding individual plants’ needs.
Getting Dry, Hydrophobic Soil Ready for Planting
Over the summer, this bed grew basil and sweet potatoes. Both did fairly well, especially the basil. This elevated bed definitely heats up more than my other beds, so I was pleased to find something that handled our hot summers here.
But when I wasn’t spending as much time in the garden, I let the bed dry out too much. The soil became hydrophobic, meaning it resisted absorbing water. Getting it hydrated again took more than a quick watering.
Here’s how I brought it back:
- Loosened the dried soil. I dug out and broke up a lot of the soil so I could work on getting it hydrated again.
- Worked on rewetting it. This took some time and attention rather than a single pass with water.
- Topped up the bed with fresh soil. Once I had worked through the dry material, I added fresh soil on top.
- Filled the oyas. These buried clay watering vessels are part of how I keep the bed watered.
- Added worm castings. I worked these into the bed before planting.
Rain helped finish getting everything ready, too. By planting time, the soil was hydrated and looking so much better. That was the starting point I wanted for these herbs.
Planting Established Herbs in Fall
Fall is the best time to plant herbs here in the low desert. I also like beginning with good-sized transplants that already have established roots. They have a head start as they settle into the bed.
That’s one of the nice things about buying herb transplants: you’re not starting from nothing. These plants already have a useful amount of growth, and I’ll be able to begin taking small harvests fairly soon.
I still have a sage plant elsewhere that survived summer, but it isn’t looking its best. After the heat, I’m ready for fresh herbs again, especially all these lovely thyme varieties.
Planting might be my favorite part of gardening. Once the preparation is finished, getting those plants into the soil feels like the reward. A newly planted bed holds so much hope. I can’t wait to see this one fill in.
Keeping the Elevated Tea Garden Watered
There are three oyas in this bed, which make watering easier, especially during the cooler months. After all the work of rehydrating the soil, I certainly don’t want to let it become that dry again.
I’m also adding mulch to help hold moisture in and protect the soil surface. The season makes a difference in how much I use:
- During summer: I use a much thicker layer of mulch.
- During cooler months: I add a lighter layer to protect the soil and help retain moisture.
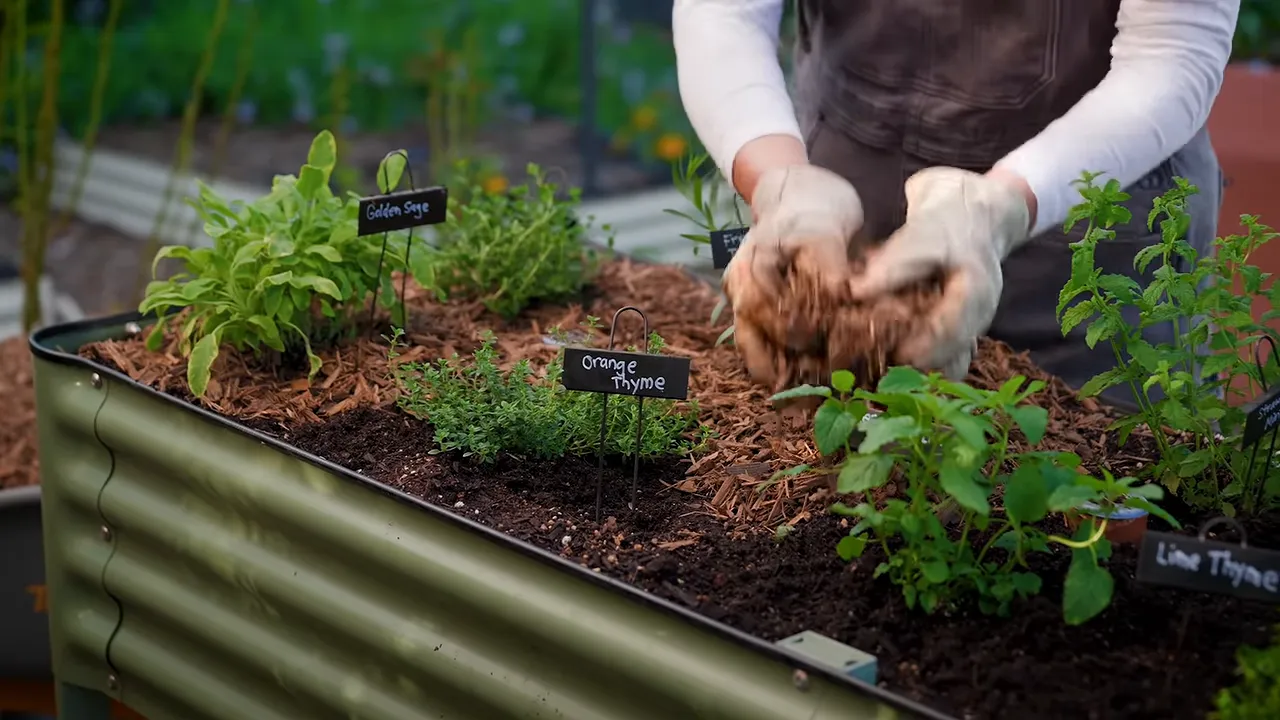
With the herbs planted, the oyas filled, and mulch in place, the bed is ready to grow. And because I started with fairly substantial plants, the first cup of tea doesn’t have to be far away.
How I Make Fresh Herbal Tea
My first blend from this bed is strawberry mint and lemon balm. A little fancy for something that starts with a few snips in the garden!
I use a favorite mug with a removable infuser. It makes the whole process easy: add the herbs, pour in hot water, let them steep, and lift the infuser out.
- Gather about 2 tablespoons of fresh herbs per cup. For this blend, I use strawberry mint and lemon balm.
- Remove the larger stems. I pull off the mint leaves rather than putting the big stems into the infuser.
- Bruise the leaves lightly. I like to gently press or rub them to help release their flavor.
- Add water just off the boil. Pour it over the herbs in the infuser.
- Cover and steep for 5 to 10 minutes. Then remove the infuser or strain out the herbs.
- Add lemon or honey to taste. I’m using a lemon from my tree and some lovely local raw honey I was given.
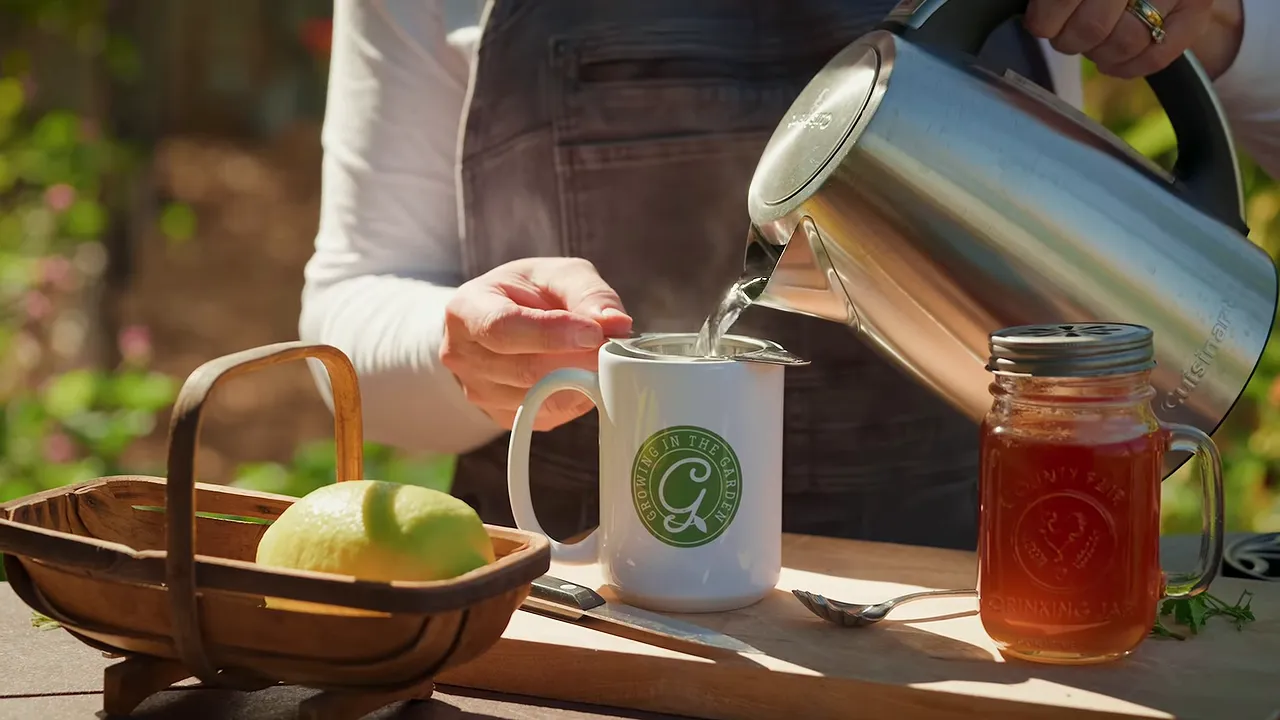
While the tea steeps, I cut the lemon. We have a wonderfully long lemon season here. One thing to remember is that rind color alone doesn’t always tell you whether a lemon is ripe. If you’re unsure, cut one open and check the fruit inside rather than relying only on its color.
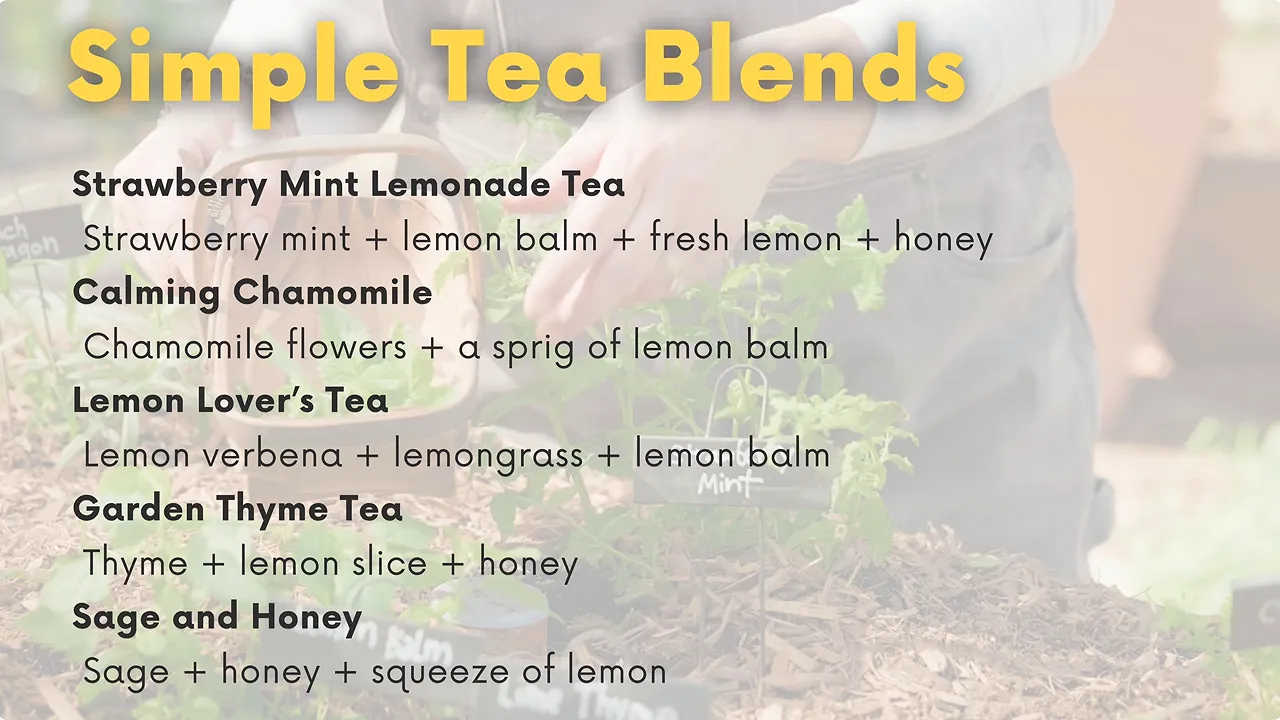
For more flavor combinations, these simple blends offer a few places to start:
A Garden to Harvest From and Enjoy
The strawberry mint and lemon balm made a lovely first cup. Fresh herbs, lemon, a little honey, and a few quiet minutes outside. That’s exactly what I hoped this bed would give me.
This herbal tea garden isn’t just another planting to tend. It’s a reason to come outside, notice what’s growing, and enjoy the garden I’ve worked to create. Sometimes the next garden task can wait until after a cup of tea.


