My compost area may not be the most exciting-looking part of my garden, but it is where so much of the magic happens. Learning how to compost has made all the difference in the health of my garden and soil.
It didn’t start that way. When I first began gardening, I requested compost bins from the City of Mesa, read a little, and did my best. I was very good at growing bugs and flies, but not compost. Eventually, I asked the city to pick up the bins. I thought composting simply wasn’t for me.
Things changed during my Master Gardener classes. An enthusiastic compost expert helped me understand the basics, and volunteering at the demonstration garden gave me the hands-on experience I needed. Once I could see how the process worked, it made sense.
There are many ways to compost. This is the simple, multiple-bin method I learned at the demonstration garden and now use at home. The key is learning to balance your materials, moisture, and air, then paying attention to what your pile tells you.
What You'll Learn
- Choose a shaded compost area with water access and room to move materials between three bins.
- Start with about four parts brown material to one part green, and keep food scraps covered.
- Monitor temperature and turn unfinished compost when it cools, adjusting moisture as needed.
- Use dark, crumbly, earthy-smelling compost to replenish garden beds or mulch the soil.
Table of Contents
- 1. Choose a Compost Location That Makes the Work Easier
- 2. Choose Compost Bins and Gather Helpful Tools
- 3. Learn What to Compost and What to Leave Out
- 4. Understand Green and Brown Compost Materials
- 5. Build the Pile with Layers and Moisture
- 6. Monitor the Temperature and Turn the Compost
- 7. Recognize Finished Compost and Use It in the Garden
- Troubleshooting Common Composting Problems
- Give Yourself Time to Learn
1. Choose a Compost Location That Makes the Work Easier
Before getting bins, decide where you will put them. A convenient location makes a big difference because you will be bringing materials in, turning the pile, and carrying finished compost back to the garden.
For this method, plan for at least three bins, each ideally about 3 feet wide, 3 feet deep, and 3 feet tall. Multiple bins let you move compost through different stages while making room for fresh materials.
Look for a location with these features:
- Enough space for the bins and for working: You need room to stand, scoop, and move material between bins.
- Wheelbarrow or cart access: A tight space means carrying more by hand, which makes the job harder.
- Easy access to water: Moistening the pile is an important part of building and turning compost.
- Shade, if possible: Full sun dries compost more quickly and makes the work less comfortable, especially in a hot climate.
2. Choose Compost Bins and Gather Helpful Tools
Your compost setup does not have to be fancy. My bins are retired garbage cans with the bottoms removed and holes drilled in the sides. The openings provide airflow, and the lids help keep the material from drying out.
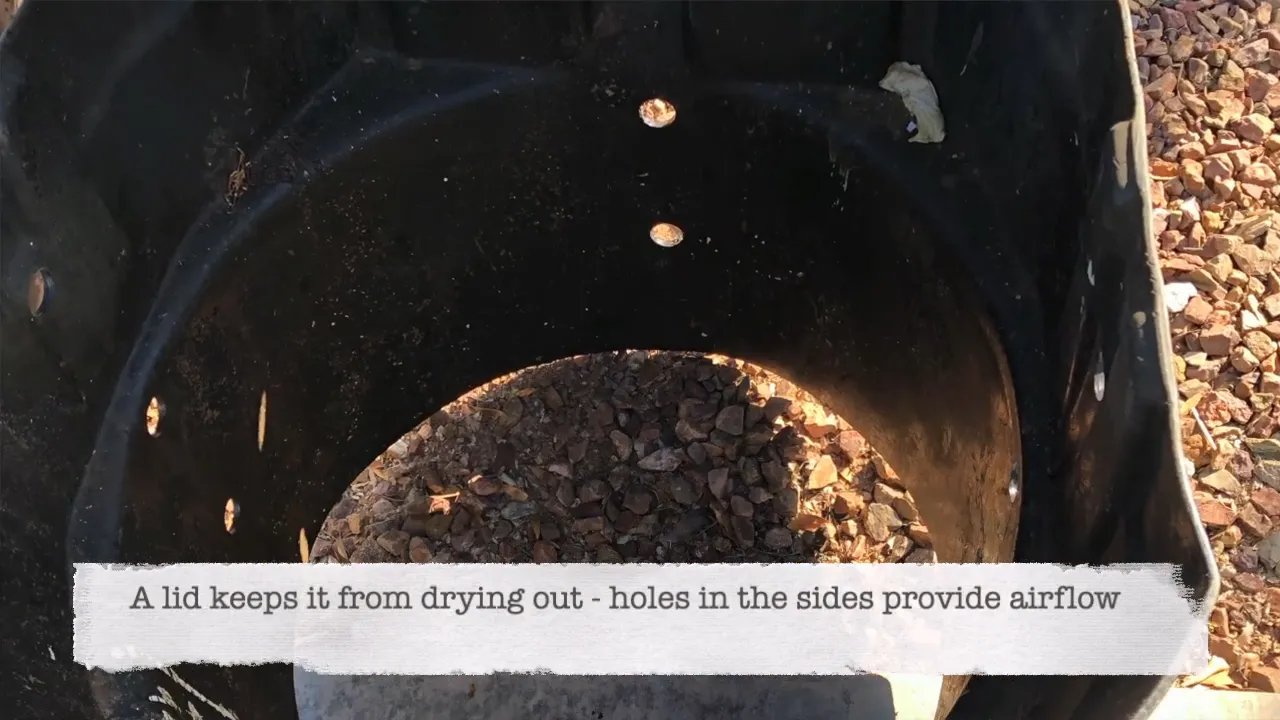
Check with your local government to see whether it offers compost bins. Mine came through the City of Mesa backyard composting program. When I obtained them, they were $5 each for residents; check the program for current availability and pricing.
You can also build compost bays from cinder blocks or pallets. The goal is to contain the material in a manageable space and make it easy to move from one area to the next.
Tools I find useful
- Compost thermometer: This takes the guesswork out of knowing what is happening inside the pile.
- Pitchfork: Useful for stirring compost, loosening compacted material, and moving it between bins.
- Deep scooping shovel: Holds a generous amount of material so you can work smart, not just hard.
- Steel pails: Handy for carrying small amounts of finished compost around the garden.
- Wheelbarrow or garden cart: Makes hauling larger amounts much easier. We use a Gorilla Cart.
- Hose with a spray attachment: Lets you moisten the materials as you build or turn the pile.
If you are deciding which tool will help you understand the process, a compost thermometer is especially helpful. A pile can look quiet on the outside while being very active inside.
3. Learn What to Compost and What to Leave Out
A home garden produces plenty of useful compost ingredients. Kitchen scraps add to that supply, and saving materials until you need them makes building a balanced pile easier.
Good materials for the compost bin
- Dry leaves
- Suitable grass clippings
- Coffee grounds
- Vegetable scraps and peelings
- Fruit scraps and peels
- Eggshells
- Healthy plant material and garden trimmings
I save all our leaves, even when I cannot use them immediately. Bags of dry leaves are wonderful to have nearby when the pile needs more brown material.
For grass, I use winter lawn clippings, but I do not use Bermuda grass clippings. I don’t want to risk introducing Bermuda grass into my garden beds. Coffee grounds are another useful ingredient. Ask a local coffee shop whether it has used grounds available.
Materials to keep out of this home composting system
- Meat and bones
- Dairy products
- Oil
- Animal waste
- Diseased plants
Diseased plants are particularly important to leave out because you do not want to spread a problem through the garden when you use the finished compost. For another reference on suitable materials, the EPA’s home composting guide is useful.
4. Understand Green and Brown Compost Materials
Greens supply nitrogen, while browns supply carbon. Getting a workable balance between the two helps the pile heat up and break down.
The names describe the role of the material, not always its actual color. Coffee grounds, for example, count as greens.
Green materials
Greens tend to be moist, fresh materials. Common examples include:
- Fresh grass clippings
- Coffee grounds
- Green garden trimmings
- Fruit scraps and peels
- Vegetable scraps and peelings
Brown materials
Browns tend to be dry and crumbly. Useful examples include:
- Dry brown leaves
- Dry hay or straw
- Shredded paper
Eggshells can also go into the compost, but don’t rely on them to provide the bulk of your brown material. Dry leaves are the brown ingredient I like to keep on hand.
5. Build the Pile with Layers and Moisture
The easiest way I have found to build a pile is to alternate brown and green materials, using more browns than greens.
- Add brown material. Begin building your pile with a supply of dry ingredients such as leaves.
- Add green material. Layer in grass clippings, kitchen scraps, or fresh garden trimmings.
- Aim for about four parts brown to one part green. Use this as a practical starting point, then adjust based on how the pile behaves.
- Spray lightly as you go. Moisten the materials throughout rather than soaking only the surface at the end.
- Finish with brown material. Cover food scraps and other greens instead of leaving them exposed.
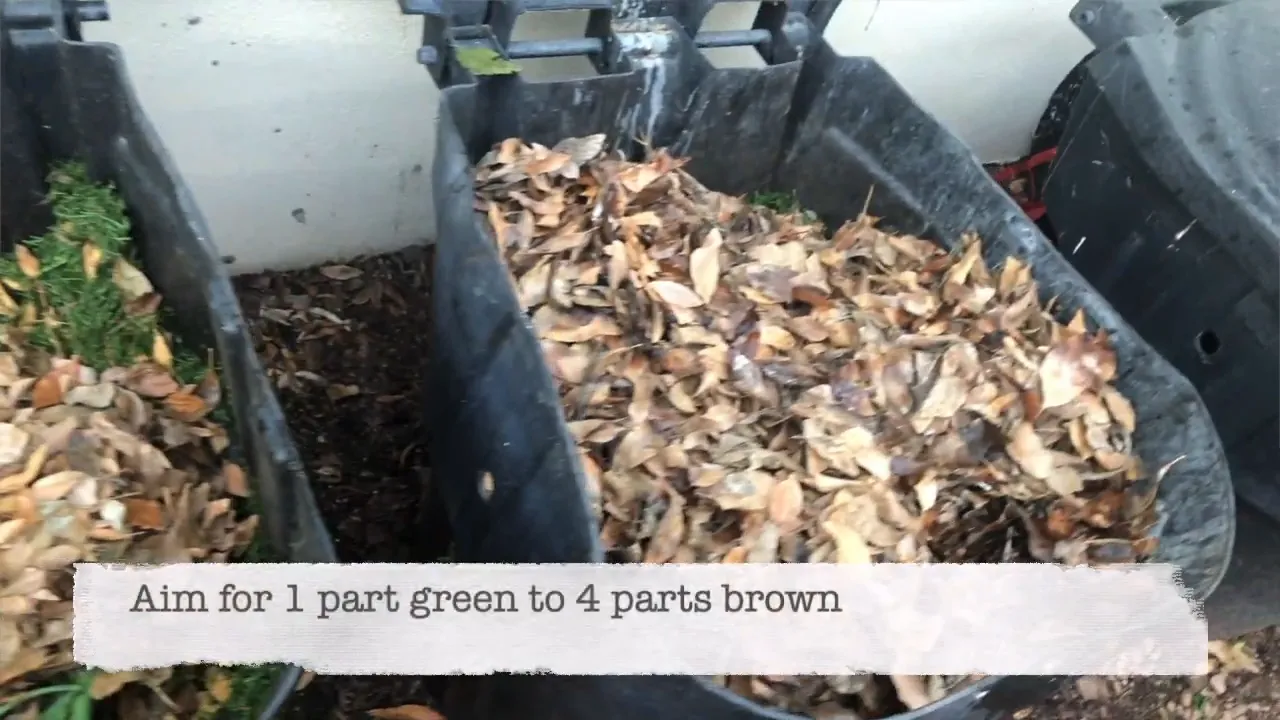
The pile should feel like a damp, wrung-out sponge, not a soaking-wet one. You want moisture throughout the materials without saturating them.
That final brown layer matters. Exposed food scraps and grass clippings can attract flies and other pests. Keeping dry leaves nearby makes covering new additions a simple habit.
Break apart any matted leaves or grass as you build. A dense clump is harder to moisten and aerate evenly than loose, mixed material.
6. Monitor the Temperature and Turn the Compost
Once the pile is built, give it time to work. You may notice the temperature starting to rise as soon as the next day. This is where the thermometer becomes so useful.
For this method, a pile between about 110°F and 160°F is actively working. While it remains in that range, observe it and let it do its thing.
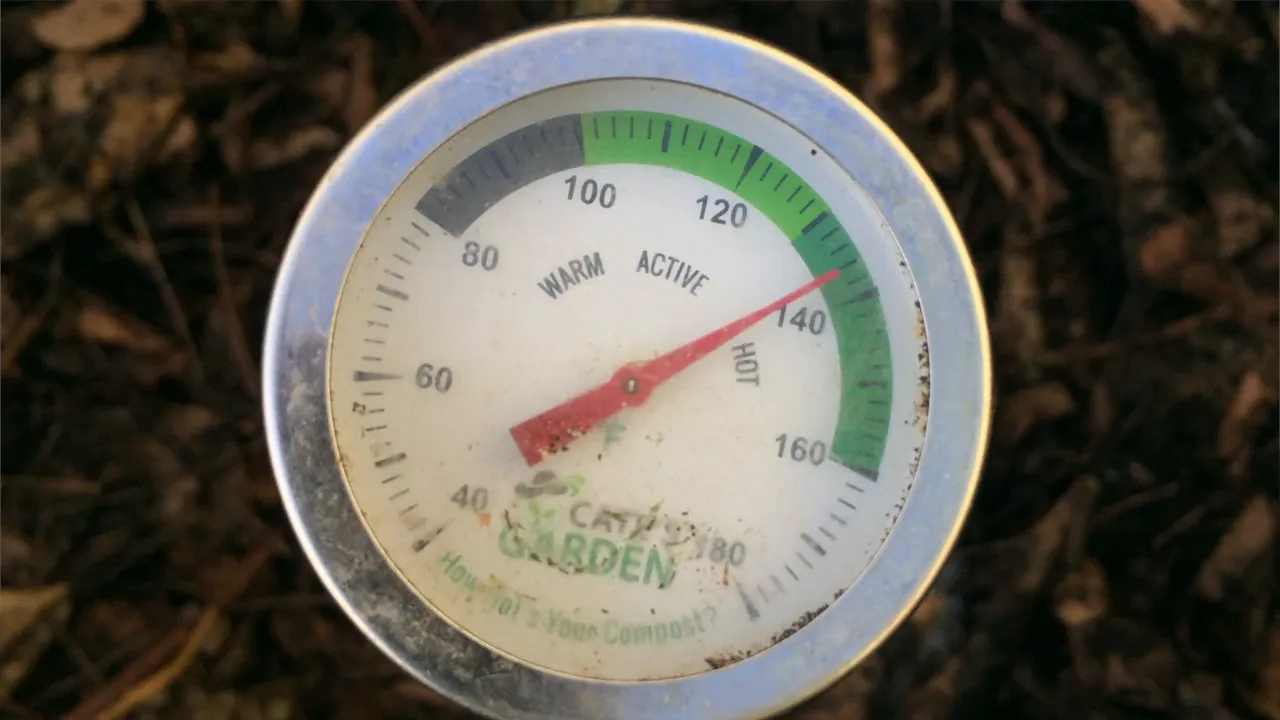
When the temperature falls below about 100°F and the materials are not yet broken down, it is time to check the pile and add air and moisture as needed.
Stir within the bin
Use a pitchfork to loosen and mix the contents. Spray lightly with water as needed while you work. Sometimes a good stir and a little moisture are enough to get the pile heating again.
Transfer to another bin
If stirring is not enough, scoop the material into a neighboring bin. Moving it naturally loosens the pile and introduces air. Moisten dry material as you transfer it, and break apart any large clumps of leaves or grass.
Check the temperature again afterward. As the pile heats and then cools, repeat the process until the ingredients have broken down.
Keep the three-bin process moving
The advantage of multiple bins is that compost can be at several stages at once:
- Beginning: Fresh leaves, scraps, and garden materials start the process.
- Middle: Partially decomposed material continues breaking down as you turn and moisten it.
- End: Finished compost is ready to carry out to the garden.
As material moves forward, the first bin becomes available for the next batch. Think of it as a continuing rotation rather than one pile that must do everything at once.
7. Recognize Finished Compost and Use It in the Garden
Finished compost is dark brown, crumbly, and has a pleasant, earthy smell. The original pile of leaves, scraps, and trimmings has become something you can use throughout the garden. Success! You did it.
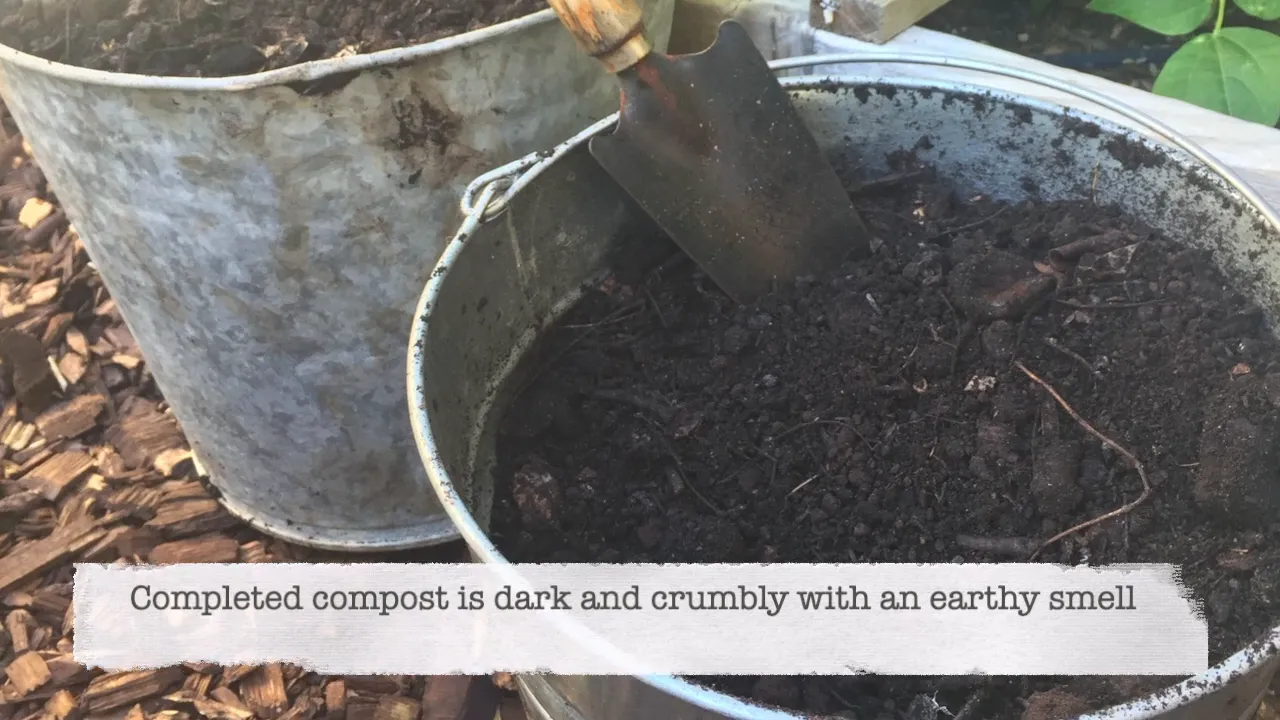
I add completed compost to existing beds, use it to replenish beds, and spread it as mulch. Pails are convenient when I need only a little, while a cart makes larger jobs easier.
I never run out of places to use finished compost.
Troubleshooting Common Composting Problems
If something isn’t working, don’t give up. Usually, the pile needs an adjustment to its materials, moisture, or airflow.
Lots of flies or other pests
Check for exposed food scraps or green materials. Cover them with dry brown material, and make sure the top of the pile is not a layer of food waste or fresh grass clippings.
The pile is wet and will not heat up
Saturated material needs more dry browns and air. Transfer it to another bin, mixing in brown material as you go to bring the moisture back into balance.
The pile is dry and will not heat up
Mix and moisten the material throughout. If the pile also lacks greens, add some green material while transferring it to another bin. Water as you go rather than just spraying the top.
A rotten-egg smell
This usually points to material that is too wet and compacted, with too little oxygen. Loosen or transfer the pile and work in dry brown material to improve its structure and moisture level.
An ammonia-like smell
There may be too much green material and not enough brown. Mix in additional browns, either within the bin or while transferring the pile. Break up matted material at the same time.
The materials are taking too long to break down
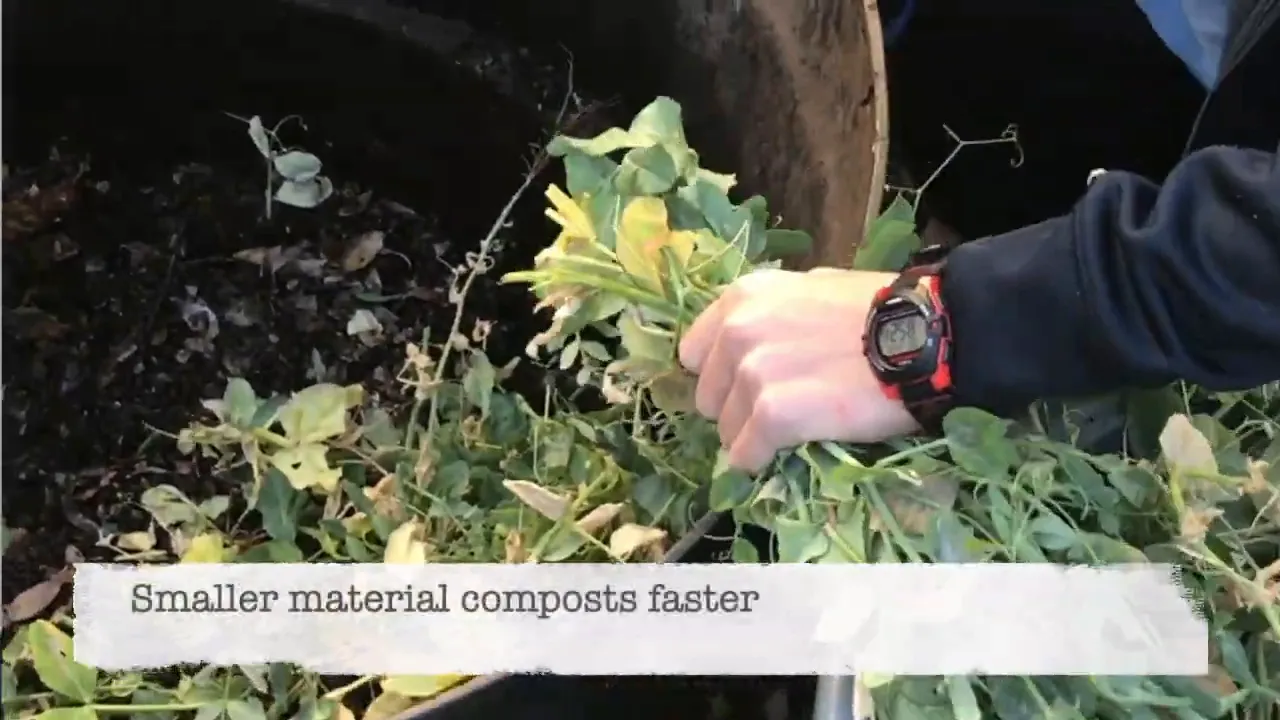
Smaller pieces compost more quickly than large ones. Cut bulky garden trimmings into smaller pieces before adding them, and pull apart compacted clumps of leaves or grass.
Rats near the compost
Food scraps may be too close to the surface. Place them toward the middle of the pile, and cover any fresh additions with brown material rather than leaving food exposed.
Give Yourself Time to Learn
Composting becomes easier with experience. Pay attention to what works, what doesn’t, and how the pile responds when you change the moisture or mix of materials.
The routine is simple: build with greens and browns, keep the pile moist but not saturated, monitor the temperature, and turn it when it needs attention. Be patient with yourself as you learn. Turning kitchen and garden scraps into something that nourishes your soil is worth the effort.
For additional detail and common questions, my 10 simple steps to composting offers another helpful reference.


