Not every garden bed gets the perfect spot. This side yard doesn’t get morning sun, crops grow a little more slowly here, and I’ve had roots find their way into the beds. But it also gets natural afternoon shade, so I don’t need shade cloth, and the space between the houses stays a little warmer in winter.
Those are advantages worth working with. The goal isn’t to make this spot behave exactly like the sunniest part of my garden. It’s to understand what it offers and set up the bed to do well here.
For this new raised bed, that means good soil, protection from competing roots, consistent watering, heat-tolerant plants, and plenty of mulch. Here’s how I put it all together before the hottest months arrive.
Key Takeaways
- Match plants to your garden’s sunlight and seasonal conditions rather than expecting every location to perform identically.
- Level the bed, preserve drainage, and address competing roots before filling it with soil.
- Determine watering time by moisture depth, then adjust frequency as temperatures and soil conditions change.
- Protect summer soil with thick mulch and check new transplants closely while their roots establish.
Table of Contents
- 1. Place and Level the Raised Bed Before Filling It
- 2. Address Nearby Tree and Vine Roots
- 3. Fill the Bed With Good Raised Bed Soil
- 4. Install an In-Bed Worm Composting Bin Before the Bed Is Full
- 5. Set Up and Test the Watering System
- 6. Determine Watering Time With a Soil Check
- 7. Plant for the Heat and the Conditions You Have
- 8. Support the Peppers and Help Transplants Establish
- 9. Finish With a Thick Layer of Summer Mulch
- Bring It Back to the Four Garden Fundamentals
1. Place and Level the Raised Bed Before Filling It
Raised beds are much easier to move when they’re empty. Before adding soil, take the time to get the location right.
I’ve had beds in this area before, so I already know approximately where I want this one. Still, I measure its distance from the house and line it up with the neighboring bed. I also check where the existing irrigation line comes up so the connection will be in the right place.
My placement checklist is simple:
- Measure the distance from the wall and neighboring beds.
- Check the location of the water supply.
- Adjust the ground beneath the bed until it sits level.
- Keep the finished soil surface level when filling.
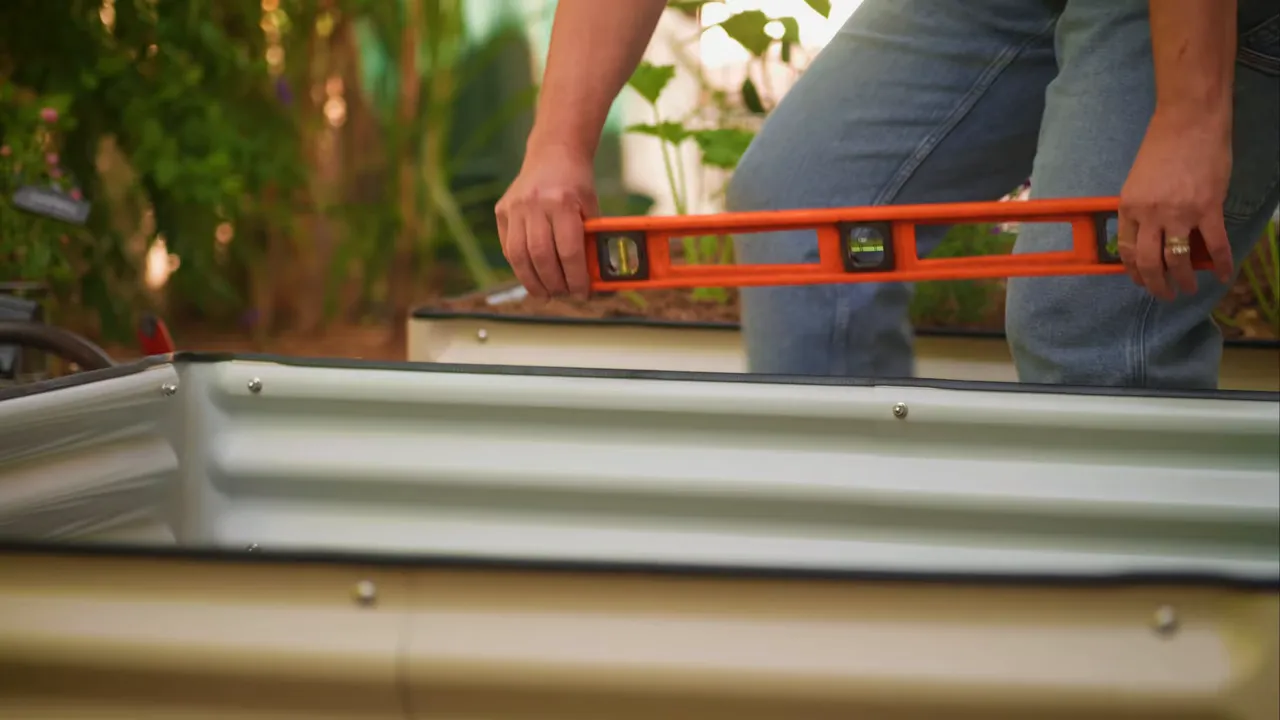
Leveling matters with the watering grids I use. A sloping surface can make uneven watering more noticeable, especially when water pressure is limited. It’s worth getting both the bed and the soil surface right at the beginning.
What should go underneath the bed?
That depends on what’s already growing there. If you have weeds underneath the bed, consider whether a barrier is needed. Bermuda grass is one situation where I would definitely look into a thick, water-permeable fabric weed barrier. Even beneath a deep layer of soil, Bermuda has a way of finding its way through.
Here, the ground is covered with wood chips, and I’m leaving those in place. The important thing is that water has somewhere to go. Whatever you put underneath a raised bed must allow drainage. Bad drainage can kill plants, even in a hot, dry climate.
2. Address Nearby Tree and Vine Roots
Mistakes really are good teachers. In this part of my garden, I’ve learned that a raised bed full of good soil can become a wonderful place for the wrong roots.
My neighbor has a very happy lemon tree. When crops in these beds weren’t doing well, I eventually discovered citrus roots filling the soil. The tree was enjoying the water and nutrients, but my garden plants weren’t getting the same benefit.
The vines along this side yard can do the same thing. Roots are going to grow toward available moisture and nutrients.
When a new gas line was installed for our hot tub, I took advantage of the trench that had already been dug and installed an 18-inch-deep root barrier along the length of this garden area. I’m hoping it will reduce the root problems I’ve had here. It’s a preventative step, not a guarantee that roots will never return.
If an established raised bed begins performing poorly, don’t assume it only needs fertilizer. Check what’s happening below the surface, especially when trees or vigorous vines are nearby.
3. Fill the Bed With Good Raised Bed Soil
This bed is 4 feet by 4 feet and 17 inches deep. I’m using a metal bed from Garden in Minutes. People often worry about metal beds in hot climates, but in my own garden I haven’t noticed a difference in performance between metal and wood.
The beds are also straightforward to assemble. My youngest son and his friend put these together one afternoon, which was a big help.
For the soil, I’m using the raised bed mix from Arizona Worm Farm. It contains:
- Compost
- Worm castings
- Perlite
- Coconut coir
I like this combination for raised beds. As we fill, I spray the soil with water to keep it hydrated rather than waiting until the entire bed is full.
I also fill the bed generously. I want to take advantage of the growing depth I have, rather than leaving a large portion of those 17 inches empty.
Add fresh worm castings as you fill
Although the soil mix already contains worm castings, I’m adding more that I’ve just harvested from another bed. They were watered shortly before harvesting and haven’t dried out.
Fresh castings from my own garden are my favorite. I mix some into the soil partway through filling, then add the rest near the top. The goal is to support the soil biology that helps make nutrients available to plants.
Mix in wool pellets for moisture retention and nitrogen
I’m also adding wool pellets. They absorb water like a sponge and provide a slow-release source of nitrogen. The application guideline for the pellets I’m using is about 1 cup per square foot. Check the directions for your particular product.
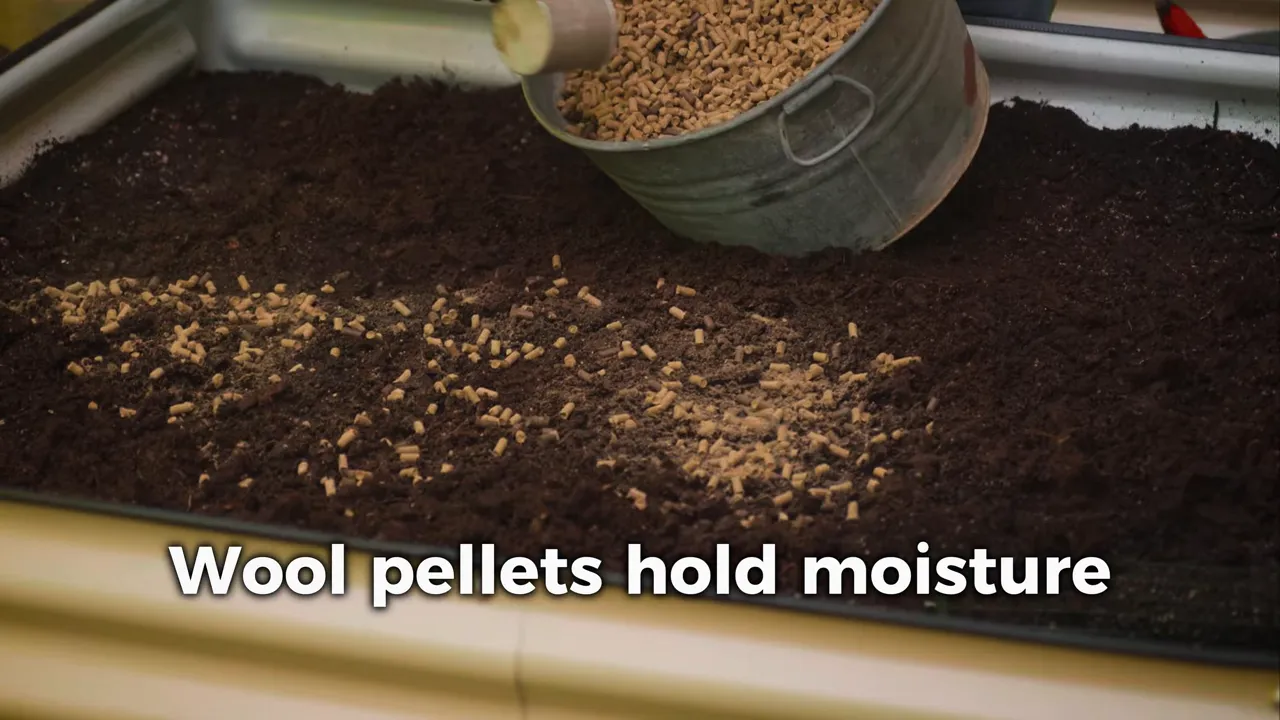
I water the pellets in and mix them into the soil as I finish filling. In a hot, dry garden, I want to give the soil every advantage I can.
If you’re concerned about slow growth during the first season, a balanced organic fertilizer is another option. Over time, practices such as adding organic amendments and using in-bed vermicomposting can build fertility and may reduce the need for supplemental fertilizer. Good soil is something we keep improving, not something we finish once and forget.
4. Install an In-Bed Worm Composting Bin Before the Bed Is Full
The easiest time to install an in-bed vermicomposting bin is while you’re filling a new bed. You can add one later, but that means digging out the space first.
I’m repurposing a deep mesh plant protector. It wasn’t designed as a worm bin, but I like its depth for these deeper beds.
I place it in a corner so the sturdy metal bed walls help support it. The mesh can flex when soil presses against it, so I gently add soil around the outside to hold it in position.
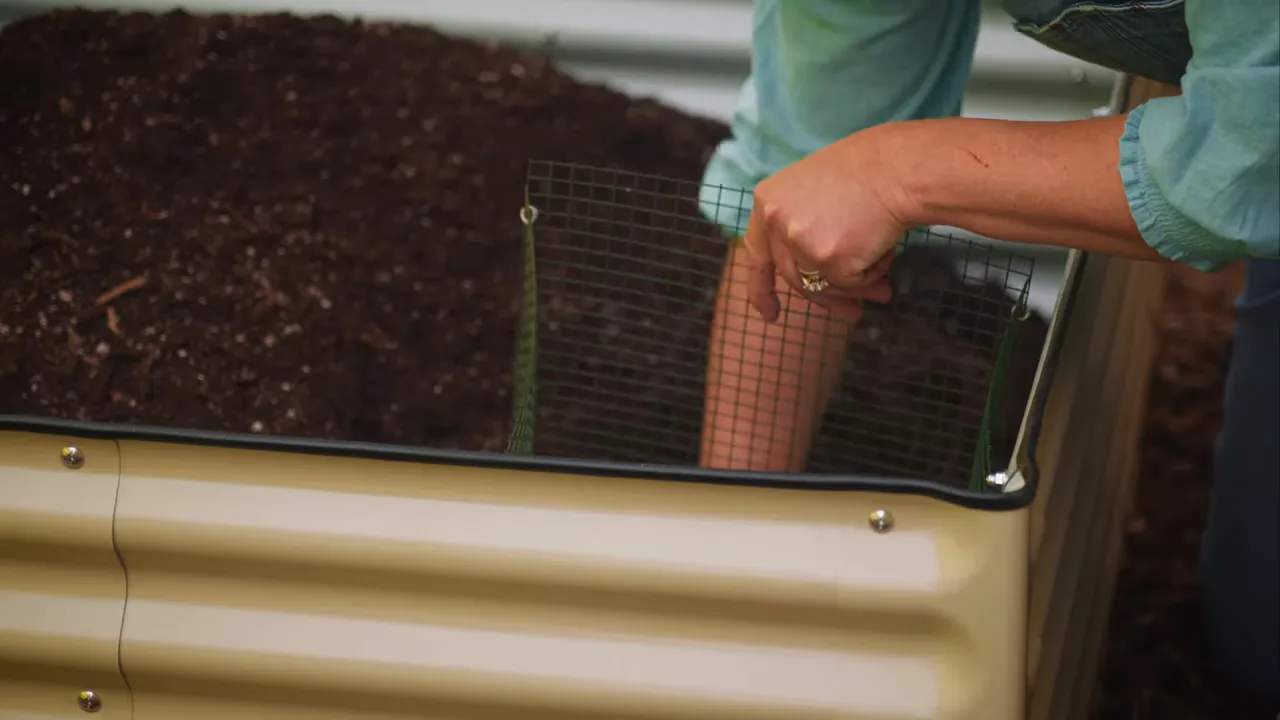
Keep the top of the bin at the top of the raised bed. If it sits too low, soil and mulch will fall inside. I adjust its height before finishing the fill.
Installing the bin now doesn’t mean adding worms now. It’s getting too hot, so I’ll wait until temperatures cool in fall. In the meantime, I plan to add food scraps for composting over summer. The watering grid will also water this area.
If you’re new to vermicomposting, the EPA’s worm composting guide provides useful background on caring for composting worms, although its indoor setup differs from this in-bed approach.
5. Set Up and Test the Watering System
Figure out how you’ll water before planting. I use Garden in Minutes beds and watering grids in my garden, and the grids are what I’m installing here.
There are two ways to supply this setup:
- From a hose: Use the appropriate hose adapter and, if desired, a battery-operated hose timer.
- From an existing irrigation system: Connect the grid to the supply line serving the bed.
This area previously had four raised beds, so the main infrastructure is already in place. A valve box supplies PVC pipe running along the beds. Each bed has its own short supply line and shutoff valve.
For this connection, I join the grid’s half-inch poly tubing to the existing half-inch poly tubing. Measuring carefully helps keep the connection at the right length.
The system is connected to my main irrigation controller, which I operate through the Rachio app on my phone. After connecting everything, I run the zone briefly, open the bed’s valve, and check that water reaches the entire grid.
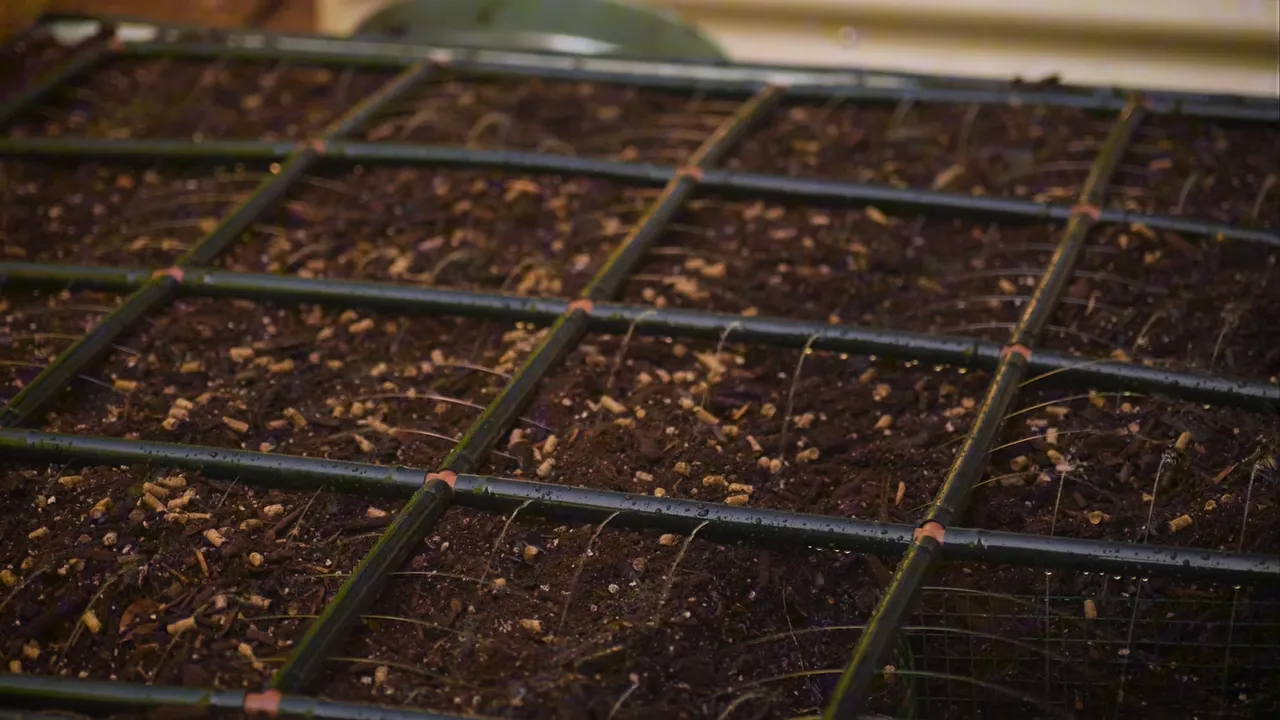
Check pressure when connecting several beds
Water pressure can become a challenge when several grids share a supply. In my setup, using PVC between the beds helps maintain pressure better than running poly tubing along the entire length.
I’ve found that a PVC-fed arrangement can work for several beds, potentially six to eight, but that isn’t a universal capacity. Test your own system with the beds you plan to run together. What matters is whether the last bed receives enough water, not simply whether the first one looks good.
Individual shutoff valves are useful, too. If one bed has already been watered, I can close its valve while the new bed gets the water it needs.
6. Determine Watering Time With a Soil Check
How long should you water a raised bed? Start with a goal, not a number of minutes: moisture should penetrate at least 12 inches deep.
In these beds, I’ve found that takes about 12 minutes of total watering time. That’s my system and my soil, not a schedule to copy without checking.
Use cycle soak to hydrate the soil
Rather than applying all 12 minutes at once, I break watering into shorter cycles with time for the moisture to soak in.
My cycle-soak pattern is:
- Water for 4 minutes.
- Wait about 30 minutes.
- Water for another 4 minutes.
- Wait about 30 minutes.
- Water for the final 4 minutes.
That still provides 12 minutes of water, but the pauses give moisture time to move through the soil instead of rushing through and seeping out the bottom. If your timer has a cycle-soak option, learn how to use it.
Change frequency as the seasons change
Once I know how long it takes to water deeply, the main seasonal adjustment is usually how often I water. Hot, dry summer weather calls for more frequent watering. Cool winter weather calls for much less.
Learn how to change both run time and frequency on your controller. A timer is helpful only if you can adjust it to what the garden needs.
Before the next watering, I’ll pull back the mulch and check the soil. If it’s still wet and soil sticks to my finger, I’ll wait. If it’s dry, I’ll water deeply again.
7. Plant for the Heat and the Conditions You Have
Heading into the hottest months limits my options, but I still want living plants in this bed. My goals are to keep the soil covered, add flowers for pollinators, and establish peppers for later harvests.
This bed will contain zinnias, gomphrena, peppers, and sweet potatoes. Each one has a purpose.
Peppers for establishment now and harvests later
We’re a little past the ideal local pepper planting window. There are still several weeks for these plants to establish, but by the time they begin flowering heavily, the heat may prevent fruit from setting.
I’m planting with fall in mind rather than counting on an immediate harvest. Peppers have done well in this side yard, and my hope is to keep these plants growing for two or three years.
The reduced sunlight slows growth compared with other parts of my garden, but this area has been a good fit for peppers and herbs. The extra winter warmth is useful, too. In my experience, tomatoes and peppers here have been less likely to freeze during frost events, although this spot isn’t frost-proof.
Sweet potatoes as living mulch
I’m planting sweet potatoes around the outside of the bed, primarily to cover the soil through summer. Depending on my fall plans, I may remove them before they have enough time to produce a harvest.
That’s okay. For this planting, their job is to grow through the heat and act as a living mulch or cover crop.
Sweet potatoes grow from slips, which are shoots that sprout from a sweet potato. You can also take a cutting from an existing sweet potato vine, remove the lower leaves, and place it in water to develop roots.
Here’s how I plant them:
- Choose the strongest slips.
- Space them at about one slip per square foot.
- Plant in the center of the chosen square, burying the stem up to the first set of leaves.
- Keep an eye on them while they establish.
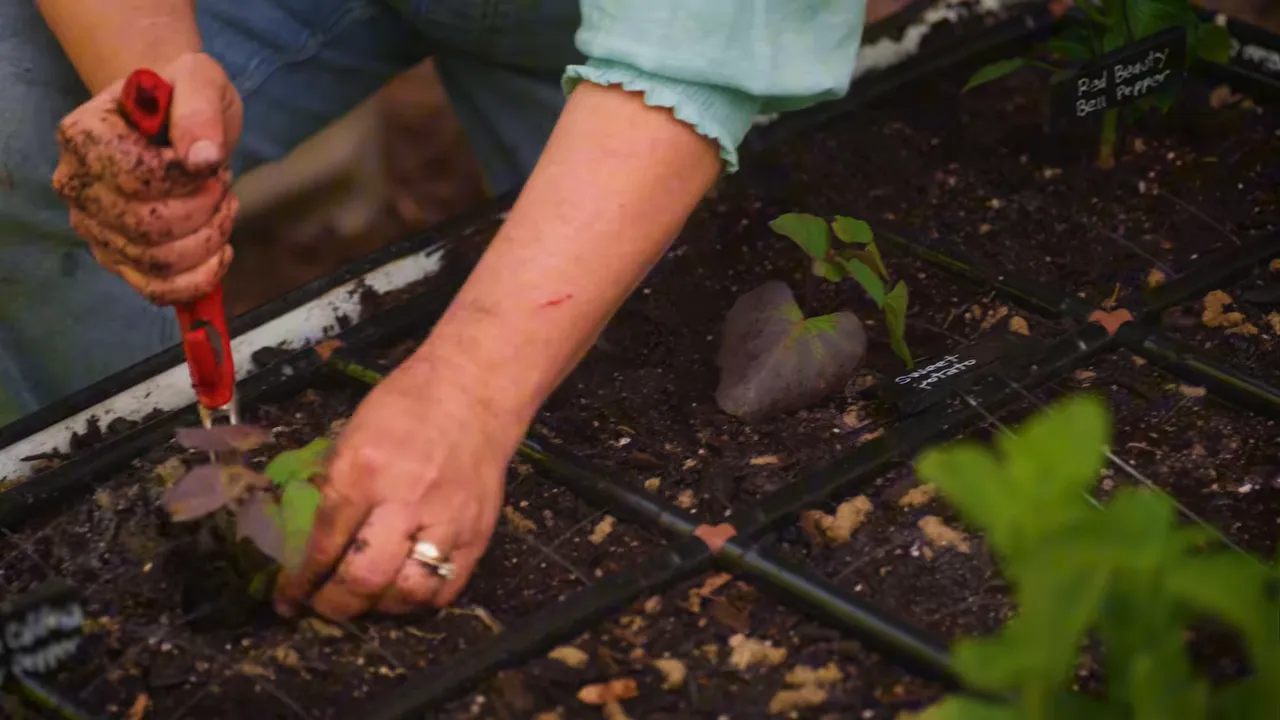
Sweet potato slips sometimes look unhappy or lose some top growth shortly after planting, even when they already have roots. Most of the time, I see them recover and begin growing again.
Zinnias and gomphrena for flowers and pollinators
I’m adding Zesty Purple and Queen Lime Red zinnias through the middle of the bed. These can become tall and wide, so I stagger their positions rather than crowding them into a tight line.
When removing transplants from their containers, check the root ball. If roots are circling or densely gathered at the bottom, gently loosen them before planting.
Gomphrena is another favorite heat-tolerant flower. Pollinators love it, and I expect it to bloom into fall. It can get big, so I give it room to fill in.
8. Support the Peppers and Help Transplants Establish
I like to install supports at planting time. For the peppers, I’m using the lower sections of Garden in Minutes cages, which fit inside the watering grid. I push them deeply into the soil for stability and can add the upper sections as the plants grow.
These pepper plants already have blossoms, but early fruit isn’t my priority. I remove those first blossoms because I want the plants to establish before putting energy into peppers.
Although pinching peppers back is another option, I’m not doing that here. With hot weather approaching, I don’t want to add more stress. Right now, I want happy, established plants.
After planting, I also apply Nutrient Plus, a biostimulant I’ve made a habit of using with transplants. I’ve noticed better establishment when I use it. I think of it as support for getting plants settled, rather than as my main fertilizer.
New transplants need closer attention
A deeply watered bed doesn’t automatically mean a newly planted root ball will stay moist enough. Those roots still occupy a small space and haven’t spread through the surrounding soil.
Check new transplants more closely than established plants. Don’t let their small root balls dry out while they’re getting settled.
When I see new shoots developing on the gomphrena, that’s a useful sign that the plant is establishing and roots are growing into the bed. At that point, I can begin easing back a little, while continuing to check soil moisture.
9. Finish With a Thick Layer of Summer Mulch
I don’t consider a bed finished until it’s mulched.
In winter, I usually add about 1 to 2 inches of mulch. In summer, I use a much thicker layer: 3 to 5 inches across the bed.
I place the mulch on top of the watering grid so the water goes directly to the soil instead of having to pass through the mulch first. Around each transplant, I leave a little breathing room rather than piling mulch against the base of the stem.
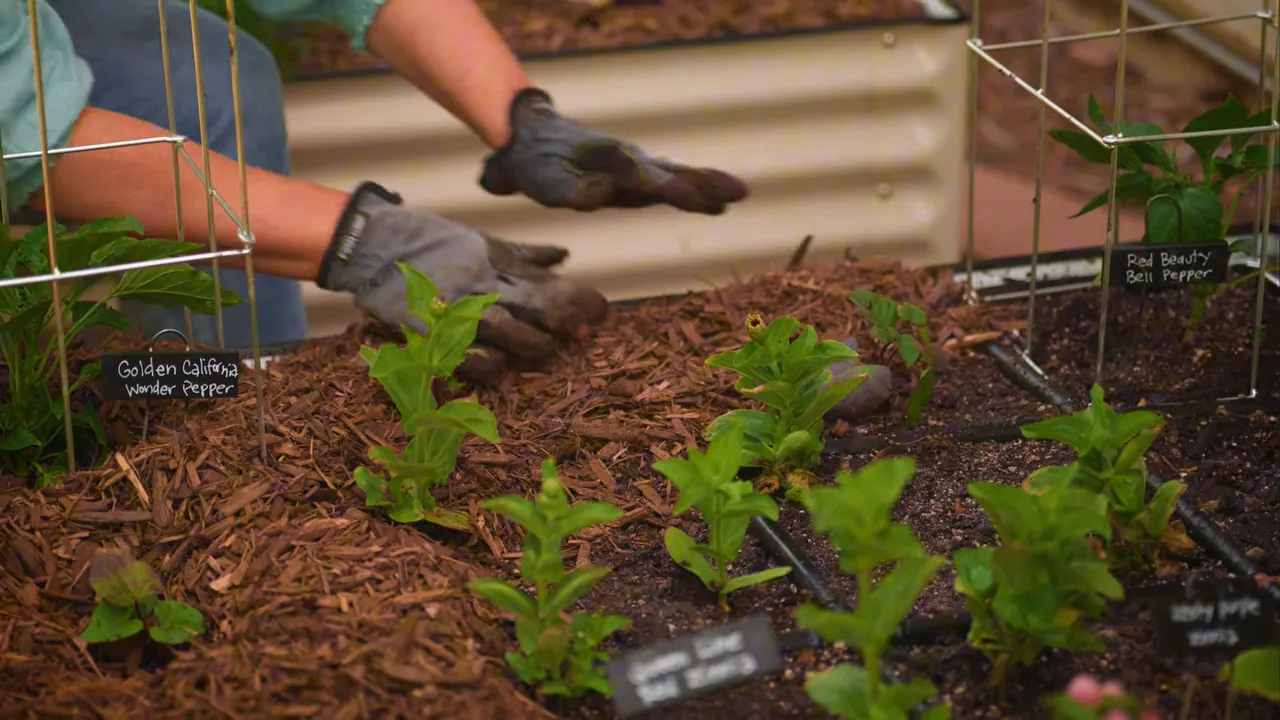
Mulch helps hold moisture and regulate soil temperature. By midsummer, the surface may look dry and bleached, but pull it back and the protected soil underneath can still look wonderful.
That protection matters when the bed sits outside through long, hot days. We put so much effort into building good soil. Mulching is one of the simplest ways to look after it.
Bring It Back to the Four Garden Fundamentals
Every decision in this bed comes back to the same four fundamentals:
- Soil: Start with a good raised bed mix and continue building fertility and soil life.
- Sunlight: Understand the light your spot receives and choose plants that have done well in those conditions.
- Timing: Plant for the season ahead, with realistic expectations about growth and harvests.
- Watering: Test your system, water deeply, and adjust frequency based on soil moisture and weather.
This bed gets less sun than some of my others, but it still gets enough to grow. A spot with no sun would be a very different challenge. Here, natural afternoon shade and extra winter warmth give me something useful to work with.
The bed is now filled, planted, supported, and mulched, with the watering system tested. The next step is paying attention: checking the soil, helping the transplants settle in, and seeing how this combination handles summer. A less-than-perfect spot can still become a valuable part of the garden.
If you garden in Arizona’s low desert and need help with timing, my planting guides show what to plant each month, so you can choose crops for the season ahead.


